Installation, Setup & Configuration Guide for System Admin
| All salesforce custom object names begin with “PSC” under namespace "PSCE" | All custom component/app/class filename begin with “PSC” under namespace "PSCE" | Rest of the objects are used as delivered by Salesforce. |
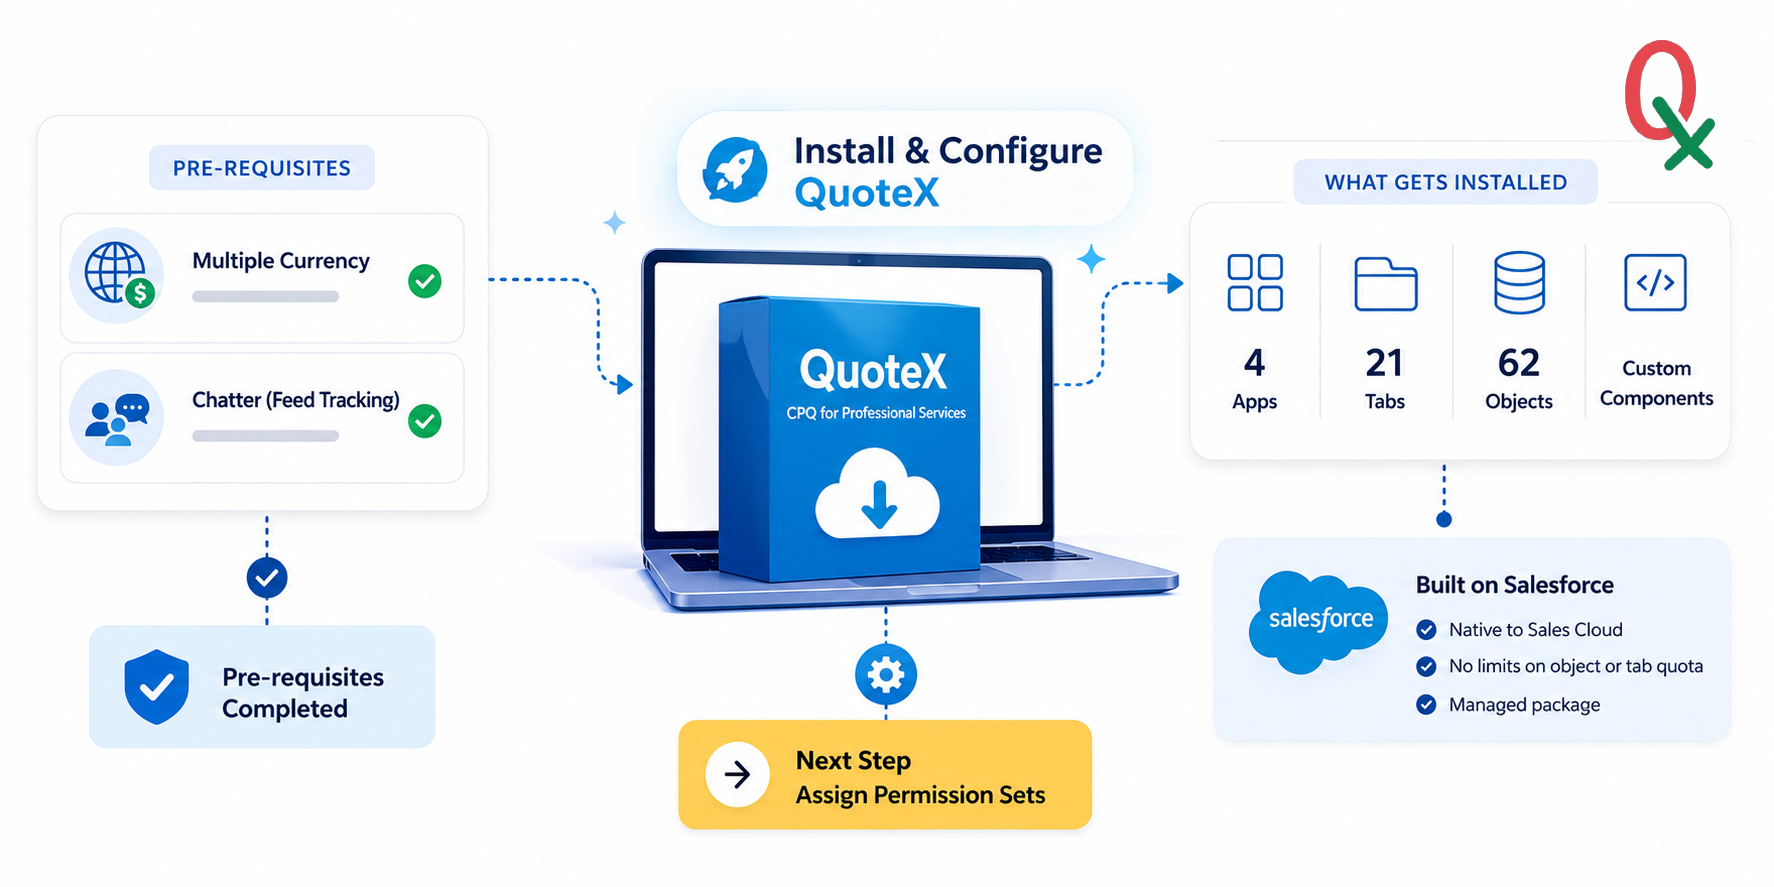
| Key Technical Features |
QuoteX is intricately designed within the Salesforce platform, boasting 4 robust Apps, 21 tabs, and 62 objects. Being a managed package , it seamlessly integrates without imposing any limitations on an organization's object or tab quota. Developed exclusively on the Salesforce Platform, QuoteX liberates teams from the confines of Excel sheets , fostering collaboration directly within the Sales Cloud environment.
| PRE - REQUISITES |
| Multiple-currency must be enabled. |
| Chatter must be enabled. |
| Installing QuoteX |
Installing QuoteX involves configuring necessary prerequisite values in your Salesforce org, downloading and installing the app, and then configuring it to meet your team's needs.
| Note: QuoteX is optimized for use with Opportunities , aligning seamlessly with the Salesforce Sales Cloud license. Additionally, as a standalone application, QuoteX offers intuitive functionality for platform licenses as well. . |
The primary managed package includes apps, tabs, and custom objects , all of which begin with the namespace prefix "PSC_" . Additionally, all custom Salesforce Object names and Components/Apex classes follow this naming convention.
GET IT NOW (Salesforce AppExchange)
https://appexchange.salesforce.com/appxListingDetail?listingId=39b27c64-de96-4797-85f5-63e3ee7c9b38
| ⚠ | IMPORTANT You must ensure the pre-requisites completion before you attempt QuoteX installation in your org. |
Pre-requisites
Before you install the QuoteX tool, you will need to make the following changes to your target Salesforce org:
| • | Multiple-currency must be enabled. |
| • | Chatter must be enabled. |
Pre-installation steps
- Enable multiple currencies for your org.
- In Setup, enter ‘Company Information’ in the Quick Find box, then select Company Information and click Edit.
- Ensure that your selected currency locale is the default currency that you want to use for current and future records.
- Enable ‘ Activate Multiple Currencies ’ and then save your changes.
- Enable Feed Tracking from Chatter Settings (Feature Settings > Chatter > Feed Tracking).
- In Setup, enter ‘ Chatter Settings ’ in the Quick Find box then click Feed Tracking.
- Make sure the Feed Tracking box is checked .
Next Step : Assign Permission Sets